

Introducing the Desktop Windowing API for Flutter
Learn about the design behind the new Desktop Windowing API and write your first multi-window Flutter application.

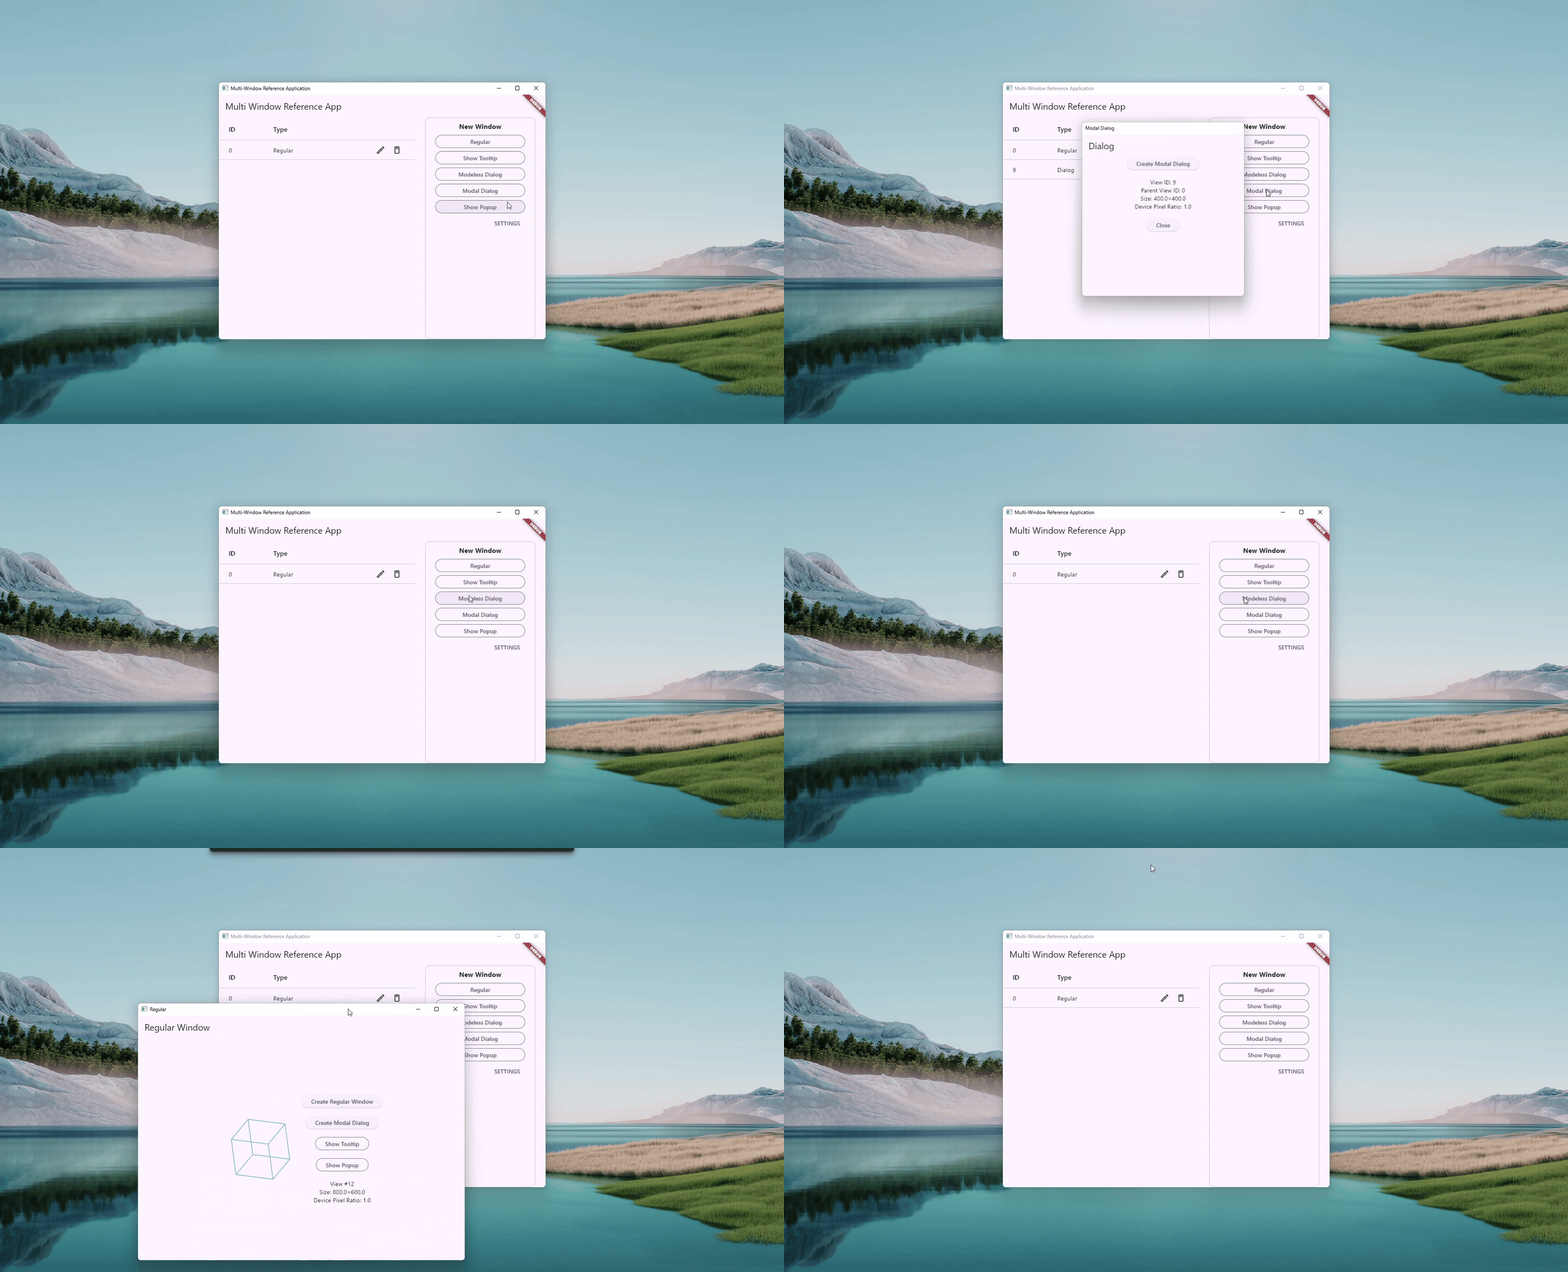
Flutter was originally released in 2018 with support for the two major mobile platforms: Android and iOS. Since then, Flutter has expanded its reach far beyond mobile, with official support for web, macOS, Linux, and Windows, in addition to custom use cases including infotainment systems in cars, smart televisions, and embedded systems. From its humble beginnings as a mobile app toolkit, Flutter has grown into a first-class toolkit for applications across a wide spectrum of devices.
But some vestiges of Flutter’s past as a mobile toolkit remain to this day. One quirk of mobile development is that you don’t have to draw to more than one window—the window simply takes up the entire screen. Instead of drawing special “windows” like popups and tooltips independently, they are rendered as overlays on top of the main window. For mobile use cases, this is a perfectly fine trade-off. The form factor is small enough that having multiple, independent windows buys the application developer very little in terms of usability.
However, this single window assumption became a problem once Flutter was released for desktop. For applications to feel at home on the desktop, they must take advantage of the screen real estate that a large monitor provides. Applications should be able to draw to as many windows as they please and–even more importantly–draw beyond the bounds of a single window. At the time, multi-window support was the 6th most requested feature in Flutter, further showcasing the importance of this feature.
While all this was happening, we at Canonical were busy integrating Flutter across mission-critical parts of our stack, including the Ubuntu Desktop Installer. We had already assumed responsibility as the primary maintainer of the Flutter Linux Embedder by this time, and we were increasingly interested in native support for a windowing API in Flutter. So in 2024, we decided to partner up with Google to tackle this new API, with Canonical leading the charge on the design and implementation, and Google supporting us with design and code reviews.
Window types and hierarchy
A major design consideration for the windowing API was how to make it cross-platform. Flutter is at its best when app developers can confidently “write once, ship everywhere”, and we wanted to design an API that made this as easy as possible. This is how we landed on the concept of window types.
Our design centers around five window types: regular, dialog, tooltip, popup, and satellite. Each window type has a specific, cross-platform behavior and purpose.
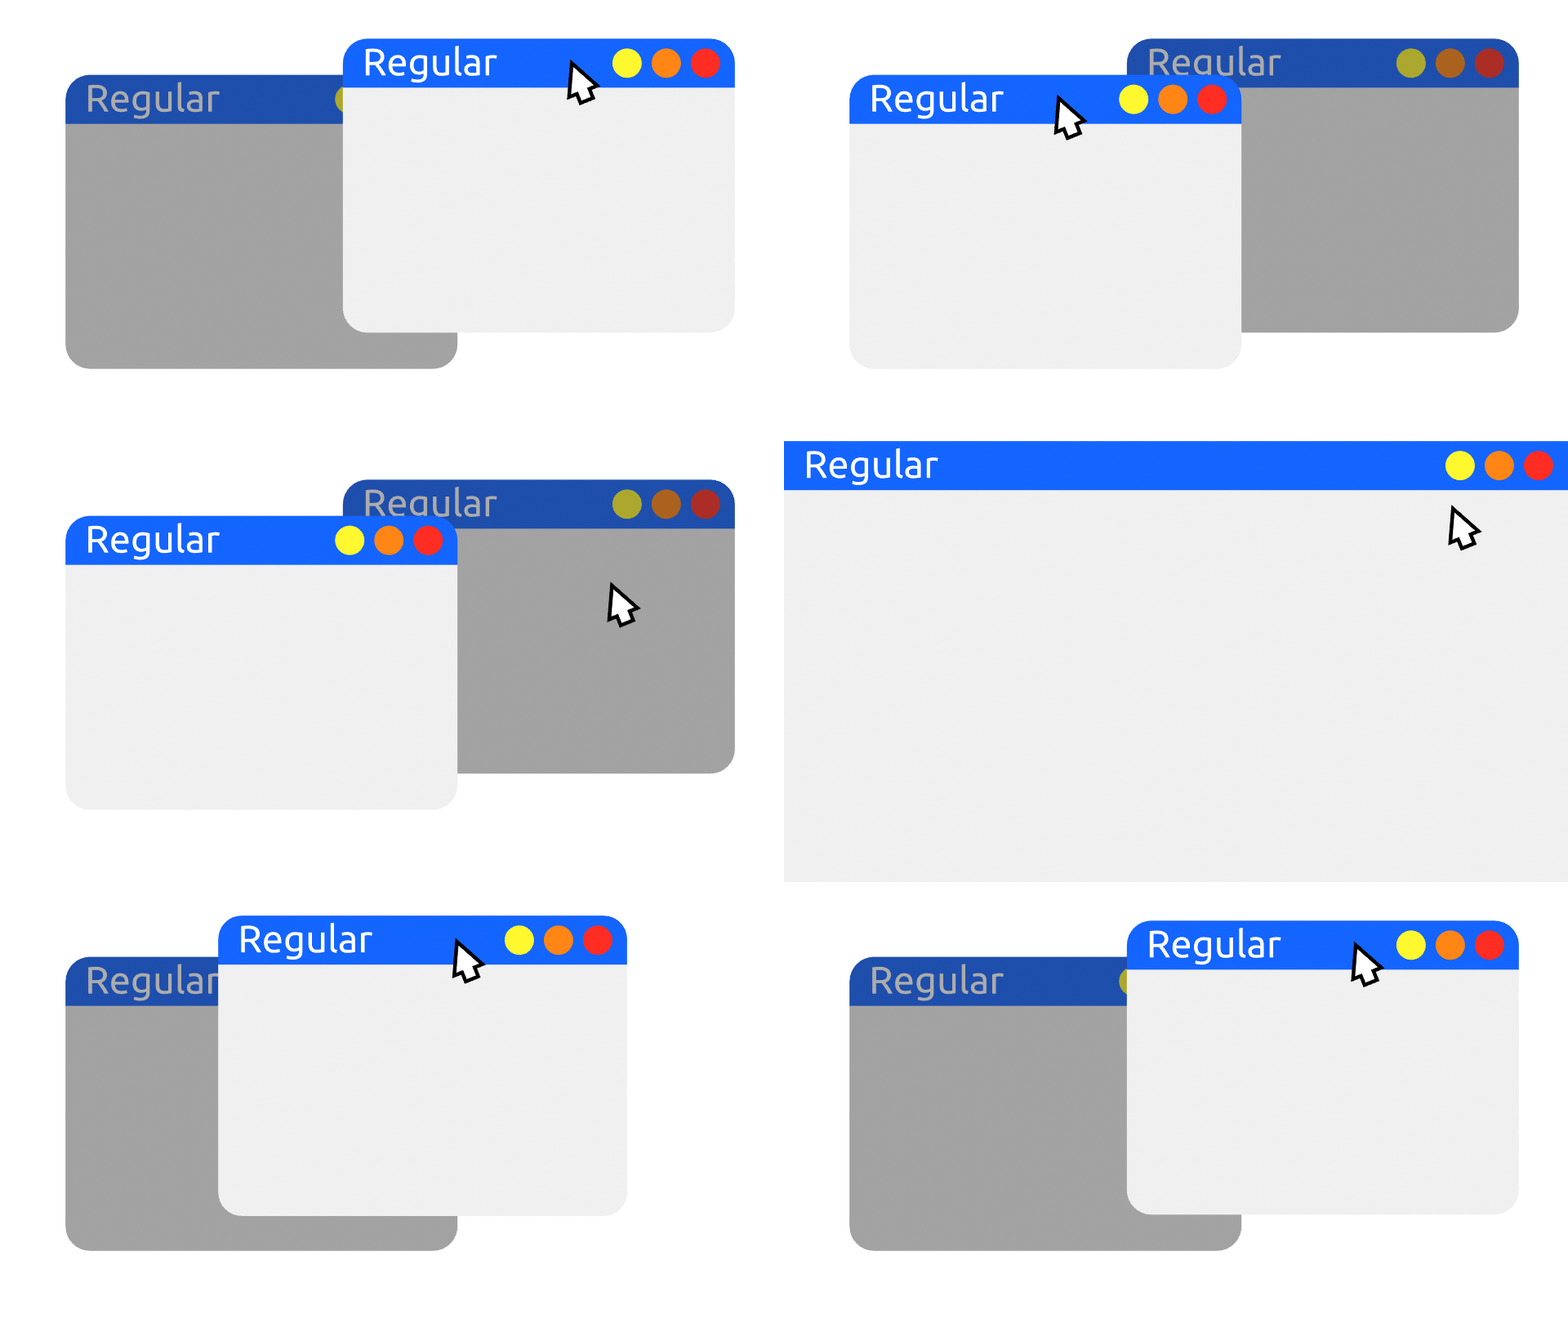
Regular windows are just that–an average window on a desktop. They have a toolbar and are resizable, maximizable, minimizable, and fullscreenable. They typically contain the main content of an application. Application developers often have at least one per application, but it is not uncommon to have more than one. For example, a web browser application can open multiple regular windows for the user to browse independently between them.
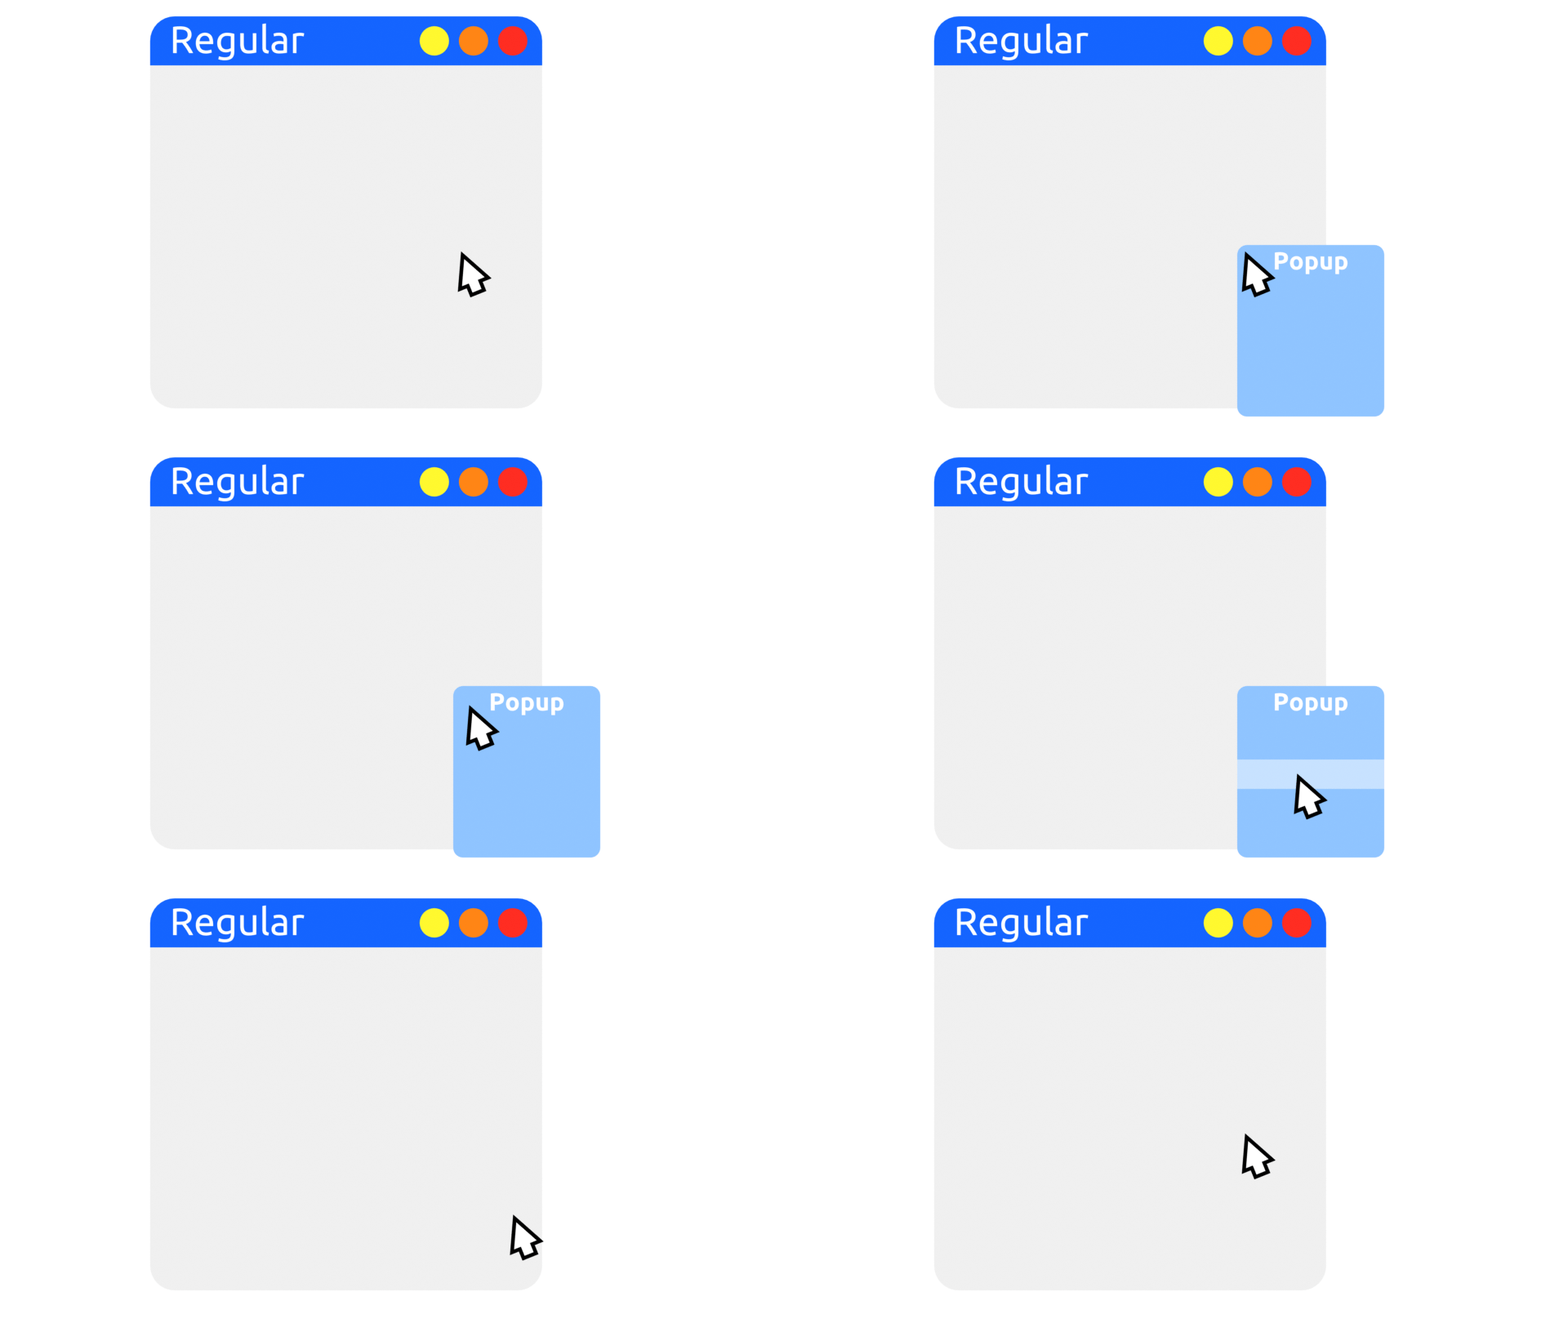
Popup windows provide functionality such as dropdown menus and text autocomplete boxes. They are child windows of other windows and are typically sized to their content. Importantly, they can receive input focus (for example, a user can navigate a dropdown menu with the arrow keys). Our implementation also enforces that popup windows remain visible on screen by translating or shrinking them, thus ensuring that important information is never lost offscreen.
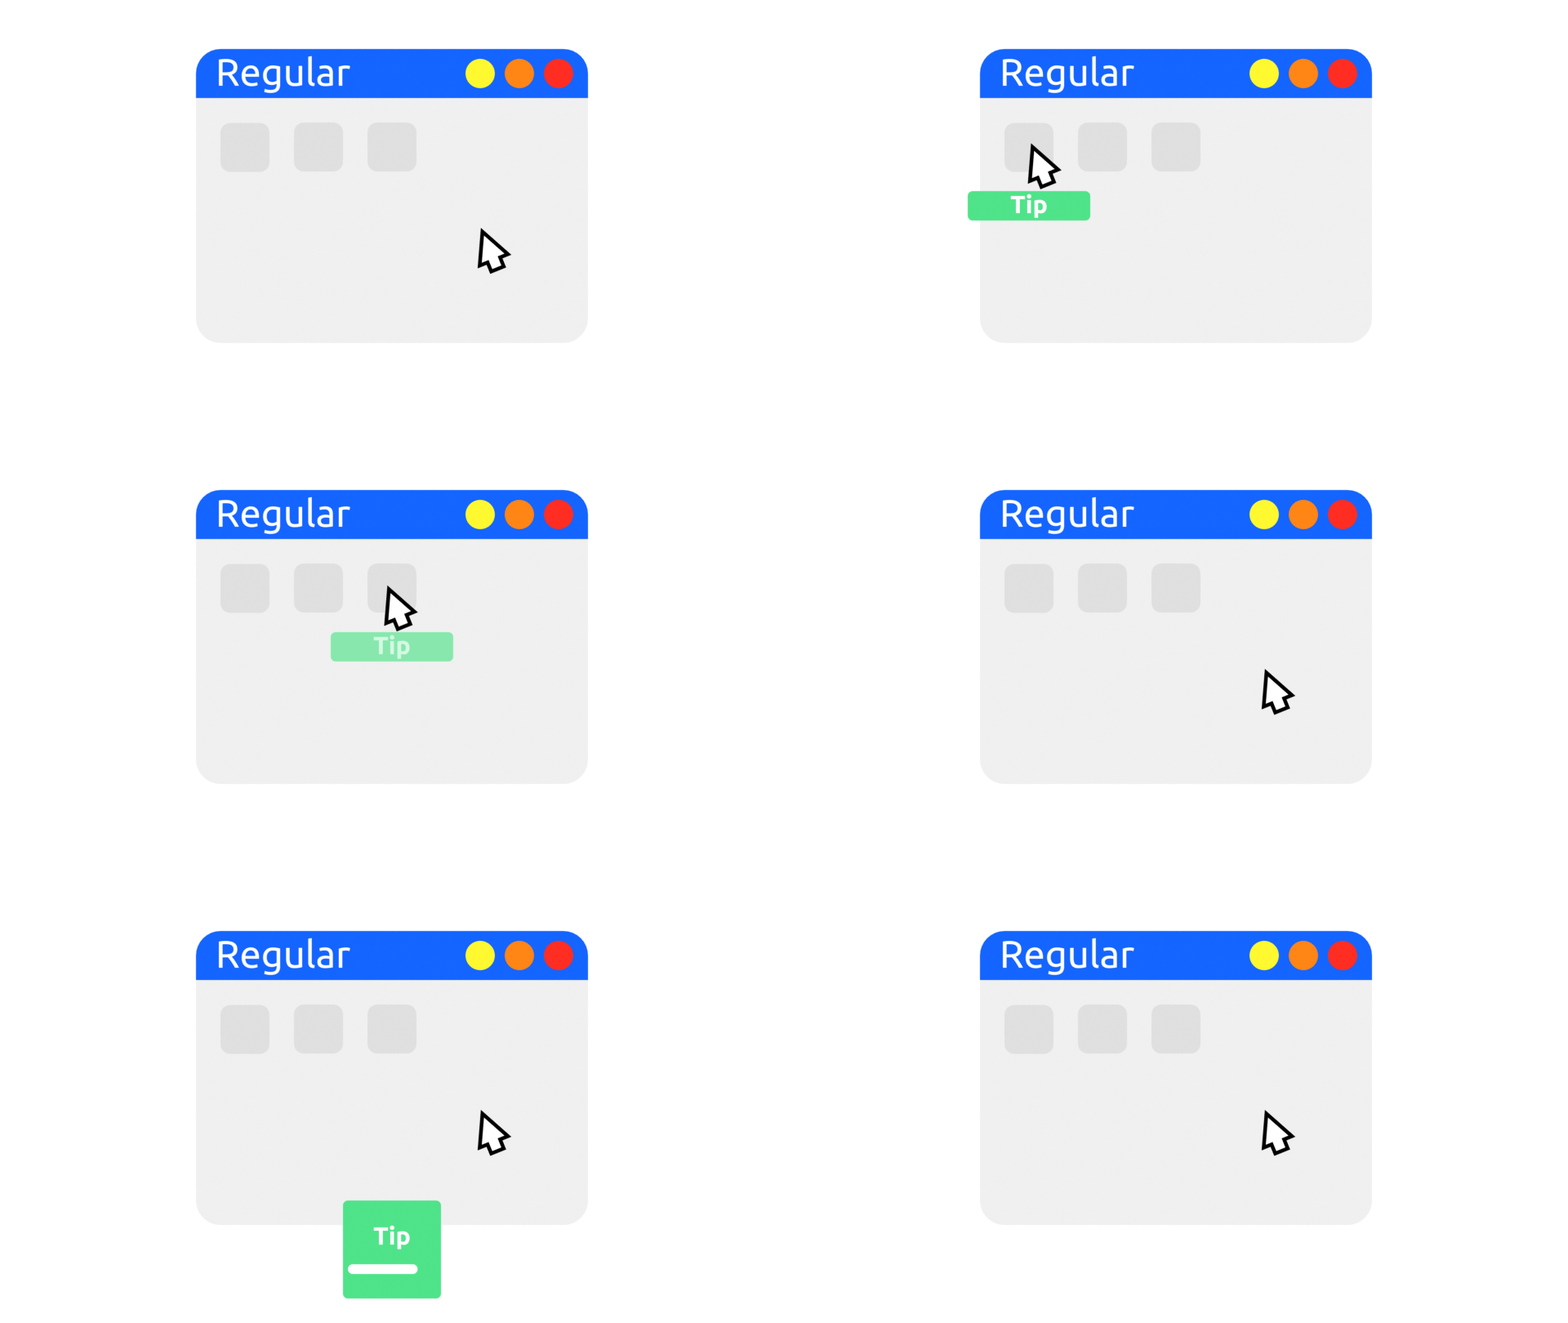
Tooltip windows are like popup windows except that they can't have input focus. These are typically used for small, fleeting bits of information. For example, input forms for credit card information often feature a CVV Number input with a small “information” icon. When hovered, this icon opens a tooltip explaining where this information can be found on your card. Small informational windows like this are best implemented in a tooltip.
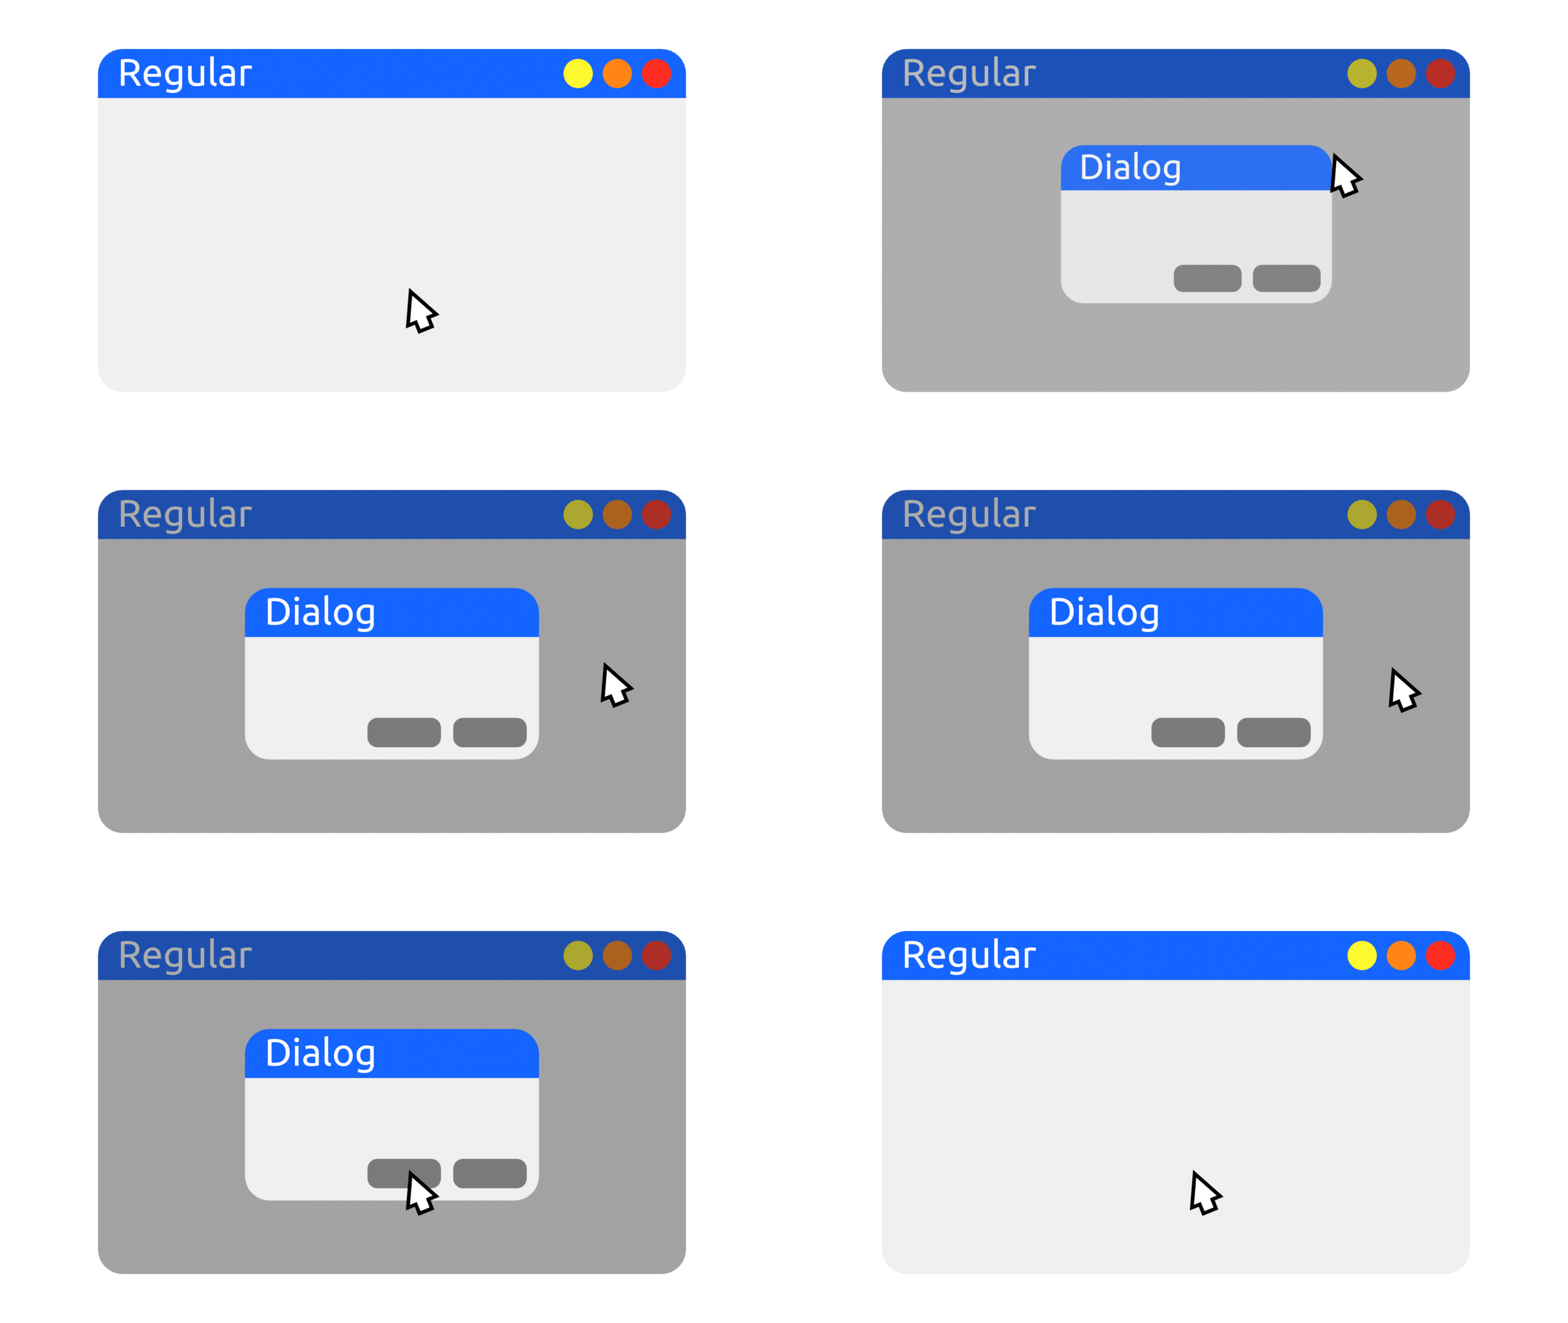
Dialog windows are child windows that typically prompt the user to take an action. Dialog windows come in two varieties: modal and modeless. When a dialog is modal to another window, that window cannot receive focus until the dialog window is closed. A common example of a dialog window is a modal prompt asking the user to confirm or cancel the deletion of an application resource.
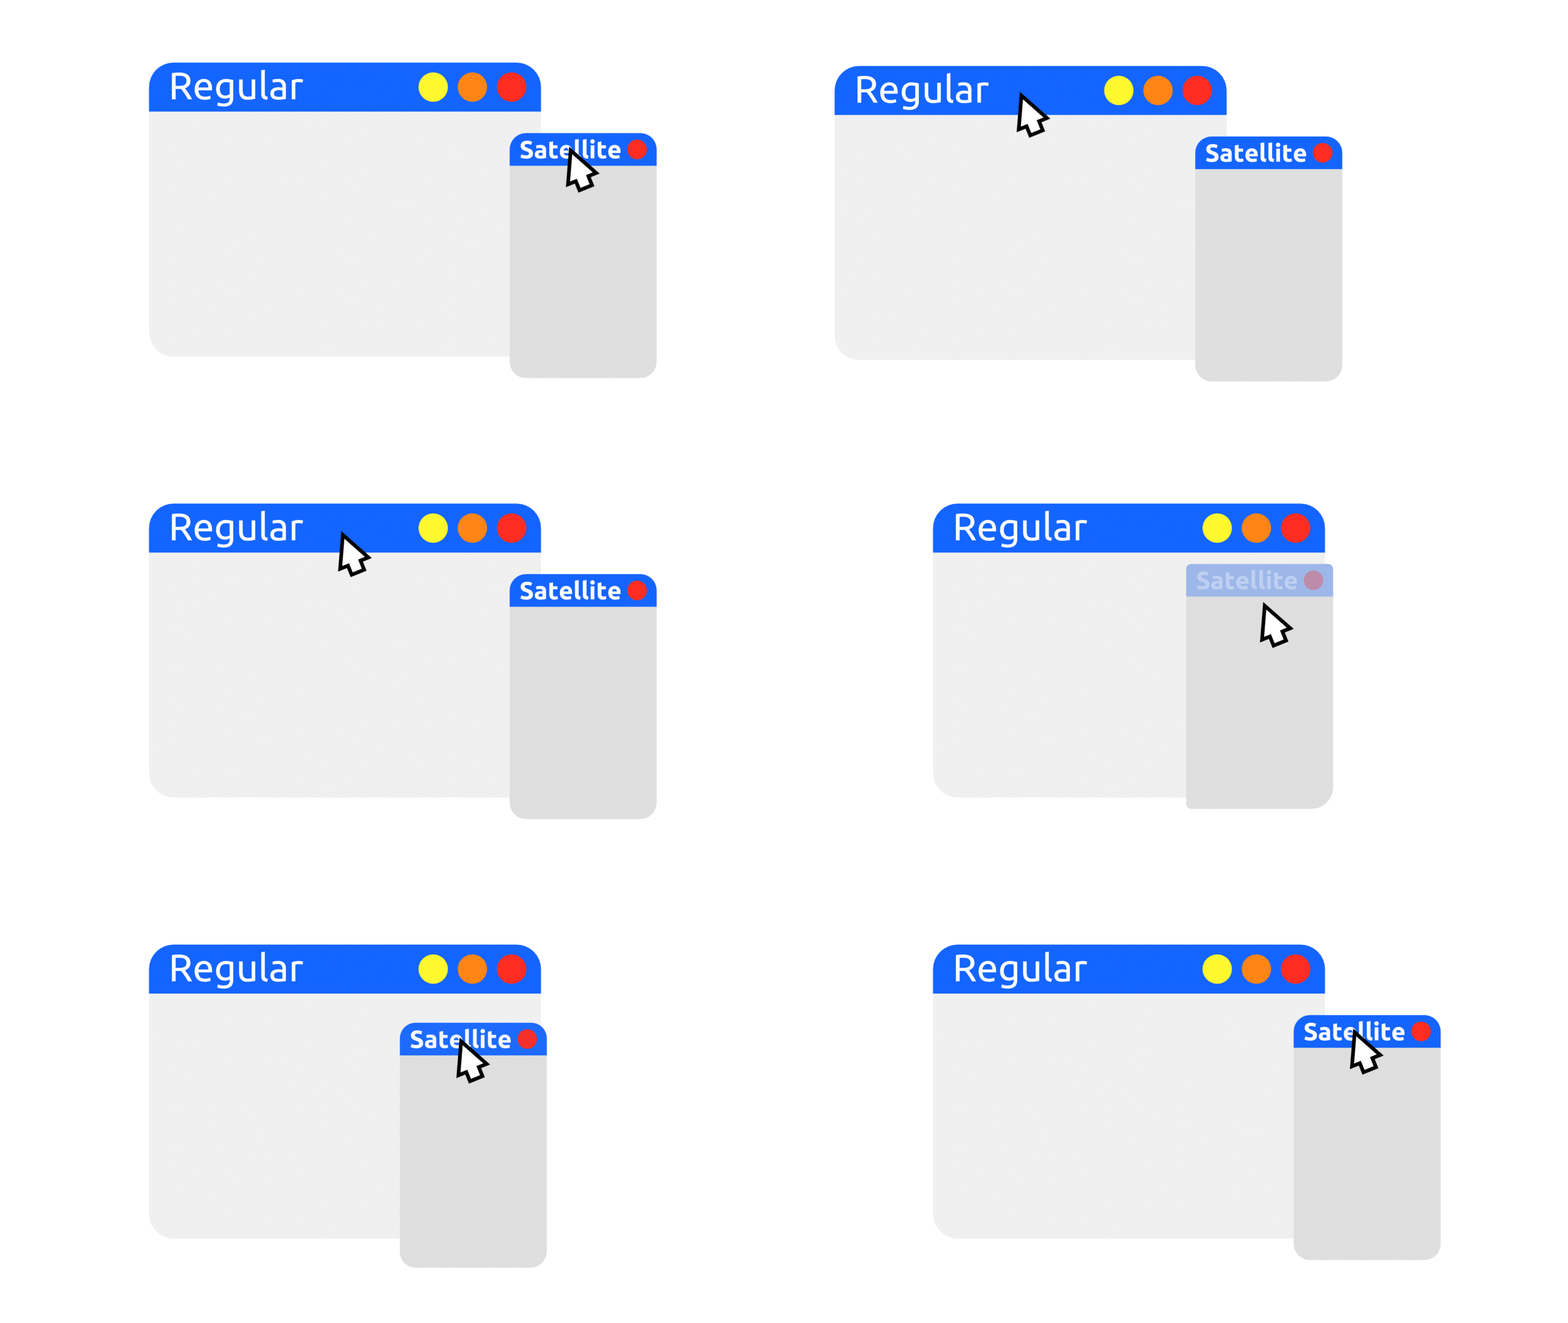
Satellite windows are ancillary windows that are used for things like toolboxes and other helpers. They are unique in that they maintain their position relative to their parent window as the parent window moves and resizes. They might also be a child of many windows at once instead of just a single window so that the toolbar can be shared across multiple main windows. Satellites are often dockable as well, meaning that they can transition from being a floating satellite window to being embedded inside of the main application content. An example of a satellite window is a toolbox containing color selection, tool selection, and more in image editing software, like GIMP.
These window types exist in a window hierarchy. For example, an application can feature a main, regular window at its root that has popups and dialogs as children. A dialog can then have a tooltip nested inside of it. The application might then open up another regular window at its root and nest another popup inside of that window. In this way, a windowing hierarchy is constructed. In practice, this hierarchy should be quite shallow, but you should incur no performance cost for having a deep hierarchy.
This design was not chosen arbitrarily. Canonical has spent the better part of the past two decades shipping a desktop that features all sorts of complex applications. Through our research, we’ve found that these primary five types are fundamental across most applications, and therefore should have first-class support in this API. The best part is that you as a developer can feel confident shipping these window types across all major desktop platforms, knowing that the behavior will always be consistent.
However, we recognize that unique situations do arise. For that reason, we always offer an "escape hatch" through which you can construct and modify your own native window for your particular platform. While not the recommended approach, this can be a powerful tool in circumstances that call for it.
Exploring the API
The windowing API is currently available on the flutter 'main' channel. Note that the APIs are hidden behind an experimental feature flag and are therefore subject to change.
To enable the windowing API, run the following:
flutter channel main
flutter upgrade
flutter config --enable-windowing
Creating and modifying a native window
To create a window, we start by creating a WindowController. The controller interacts with the underlying platform to create and update the window.
final controller = WindowController(
  title: 'My Application',
  size: const Size(800, 600),
);
The controller is provided with the initial configuration of the window, which includes a size and a title in this case. Note that these arguments may not be honored by the platform. For example, a platform can choose a smaller size for the window if the screen is not large enough to accommodate the requested size.
Each window type has its own window controller that receives different arguments. For example, to create a dialog window instead of a regular window looks like this:
final dialogController = DialogWindowController(
  title: 'My Dialog',
  size: const Size(400, 300),
  parent: parentController,
);
Unlike a regular window, a DialogWindowController accepts an
optional parent window controller in its constructor.
Once a controller is created, it can be used later on to modify the window. For example, we can modify the title or size of the regular window that we created earlier, or even destroy it:
controller.setTitle('Hello, world!');
controller.setSize(const Size.square(1000));
controller.destroy();
Rendering into a native window
Now that we know how to create and update our native window,
it’s time to render something inside of it. To do this,
we pass our controller and the content to render to a Window widget:
Widget build(BuildContext context) {
  return Window(
    controller: controller,
    child: MyPage(),
  );
}
Each window type has its own corresponding widget. For a regular window,
we use the Window widget, but for a dialog window,
we would use the DialogWindow widget.
It's worth noting that all windows are in a single widget tree. That means that you can share state across your windows without any additional work. Existing state management packages like Riverpod or Bloc work out of the box!
Listening to events on a native window
Now that we know how to create our native window and render something into it,
we have one more piece of the puzzle to solve: how do we receive
notifications from the system about our window? This is achieved in two ways:
through the window controller delegate and the WindowScope.
The WindowControllerDelegate notifies us about important lifetime events,
such as the window being destroyed or the system asking us to destroy
the window. We implement a delegate by overriding the delegate controller.
For example:
// Create the class first...
class MyWindowDelegate with WindowControllerDelegate {
@override
void onWindowDestroyed() {
super.onWindowDestroyed();
ServicesBinding.instance.exitApplication(AppExitType.required);
}
}
// and then pass it to the controller constructor.
final controller = WindowController(
title: 'My Application',
size: const Size(800, 600),
delegate: MyWindowDelegate(),
);
This delegate exits the application when the window is destroyed, which is often the appropriate implementation for the primary window of an application.
We can listen to less critical information about a window with the help
of the WindowScope, an
InheritedModel
created by every Window widget. Widgets nested in a window can use
WindowScope.of to access the scope. Alternatively,
they can use one of the various field-specific accessors on the WindowScope
to listen on specific fields of their window. For example,
if a widget is interested in the title of the window,
it can do something like this:
class MyWidget extends StatelessWidget {
  @override
  Widget build(BuildContext context) {
    final title = WindowScope.titleOf(context);
    // ... do something with the window title
  }
}
This widget will now rerender whenever the title of the window changes.
"Hello, Window" example
Now that we understand the API and the rationale behind it, the following self-contained "Hello, Window" example app should be entirely understandable. Feel free to copy and paste it into your own Flutter project to try it out on your own:
// ignore_for_file: invalid_use_of_internal_member
// ignore_for_file: implementation_imports
import 'dart:ui';
import 'package:flutter/services.dart';
import 'package:flutter/src/widgets/_window.dart';
import 'package:flutter/widgets.dart';
/// Exits the application when the user closes the window.
class ExitOnCloseDelegate with WindowControllerDelegate {
@override
void onWindowCloseRequested(WindowController controller) {
ServicesBinding.instance.exitApplication(AppExitType.required);
}
}
void main() {
WidgetsFlutterBinding.ensureInitialized();
runWidget(const HelloWindow());
}
/// Displays a window and owns its [WindowController].
class HelloWindow extends StatefulWidget {
const HelloWindow({super.key});
@override
State<HelloWindow> createState() => _HelloWindowState();
}
class _HelloWindowState extends State<HelloWindow> {
final WindowController _controller = WindowController(
size: const Size(600, 400),
title: 'MyApp',
delegate: ExitOnCloseDelegate(),
);
@override
void dispose() {
_controller.dispose();
super.dispose();
}
@override
Widget build(BuildContext context) {
return Window(
controller: _controller,
child: const Directionality(
textDirection: TextDirection.ltr,
child: ColoredBox(
color: Color(0xFFFFFFFF),
child: Center(
child: Text(
'Hello, Window',
style: TextStyle(color: Color(0xFF000000), fontSize: 24),
),
),
),
),
);
}
}
The great thing about this example is that it will work out-of-the-box across all of the major desktop platforms, without any additional work required from you.
One important thing to note about the above example is that we no longer
use the runApp
function to render our root widget, as that attaches the widget to a view
created implicitly by the platform. Instead, we use
runWidget
and supply it with our own view, which is our Window.
Design system integration
One important point to note is that, in the long term, most users of the windowing API won't explicitly interact with it. Instead, it will be integrated under the hood by one of the existing design systems. By opting into the design system, you will simply get all of the neat window features out of the box.
Specifically, the team is currently hard at work integrating the new windowing API into the Material design system. Our planned integrations are with:
These methods will all use a true, native window when the platform provides it. When the windowing API is unavailable on a platform (e.g. mobile), then we will fall back to the existing implementation. The API will also offer ways to opt out of windowing entirely in circumstances where that is desirable.
Conclusion
The windowing API has been a multi-year design and engineering effort between Canonical and Google, and we are very excited to finally get it into your hands. If you’re interested in seeing what a more complex multi-window application looks like, check out https://flutter.dev/to/windowing-example.
We look forward to seeing what you build!
More from Flutter
How I converted GenLatte to fullstack Dart
And reduced the app's server bill

Quick, reliable calculations with A2UI's Client-Side Functions
Learn how client-side functions allow an agent to delegate local operations directly to Dart code running on a user's device.
